The DIY Gun Vise Project
March 8th, 2010 by Blogging Farmer One of the hobbies that I took up after moving out to the countryside was firearms. Many people living in cities don’t like the idea of guns, and I agree to an extent. A packed, stressful environment like the city is probably not the best place for people to have guns. Out on the farm, things are different.
An important piece of equipment for any gun owner is a stable gun vise to enable you to clean or tinker with your firearms safely, easily and without damaging them. You can buy one, of course, but frankly most of the products out there are either made out of flimsy plastic or over-priced. With the help of this guide, you can build a nice wooden vise in just a few hours.
I got my inspiration from this page (scroll down until you see the heading “Gun & Gear Review”). My version has one or two extra features. The materials I used were:
 4-foot length of 2×10… not great quality, just a piece of wood I had in the garage.
- A few wood scraps.
- Woodworker’s clamp. At $15.98, this was the single most expensive component of the vise.
- Leather scraps to pad the surfaces that will be in contact with the gun.
- Wood glue, to attach the wood parts together
- Contact cement, to attach the leather to the wood
You can see how it all comes together on the schematic to the right. Here is an overall view of the end result:
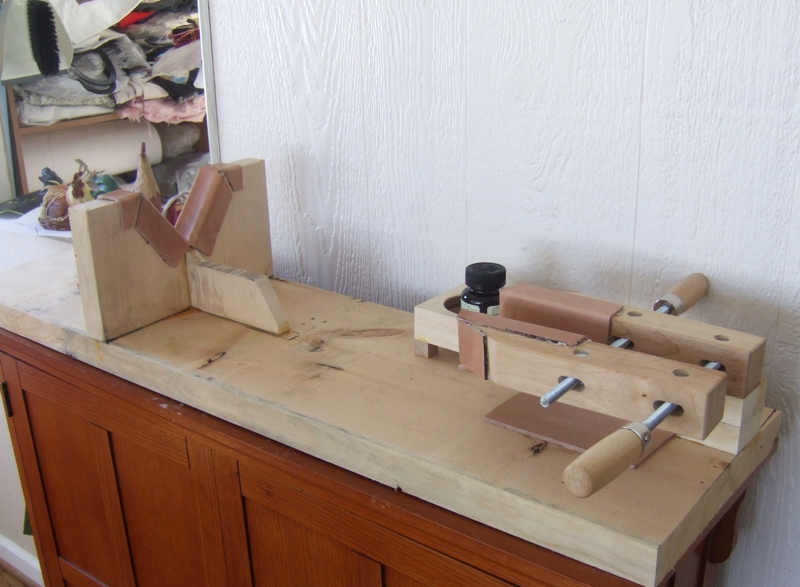
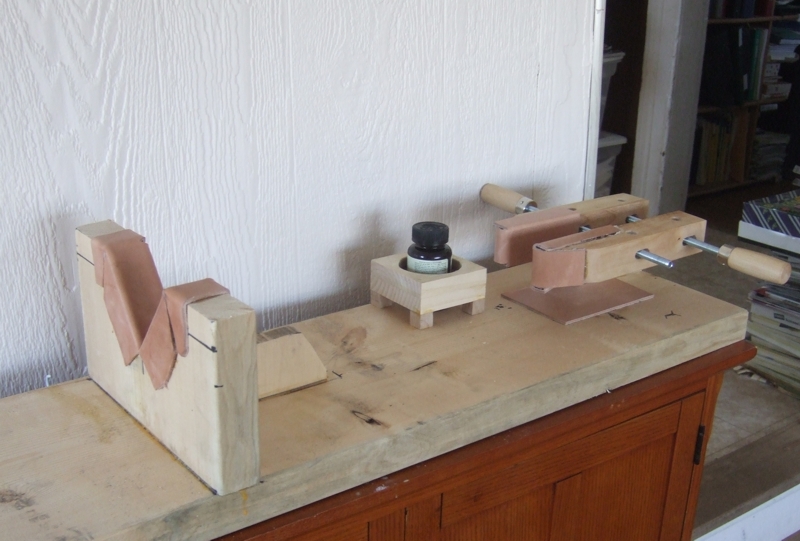
An overall view from another angle:
All the wood parts are just glued together. It would be stronger to use screws together with the glue, but frankly, wood glue dries tougher than the wood it’s bonding. It’s plenty strong for these purposes. Here’s a close-up of the forend:
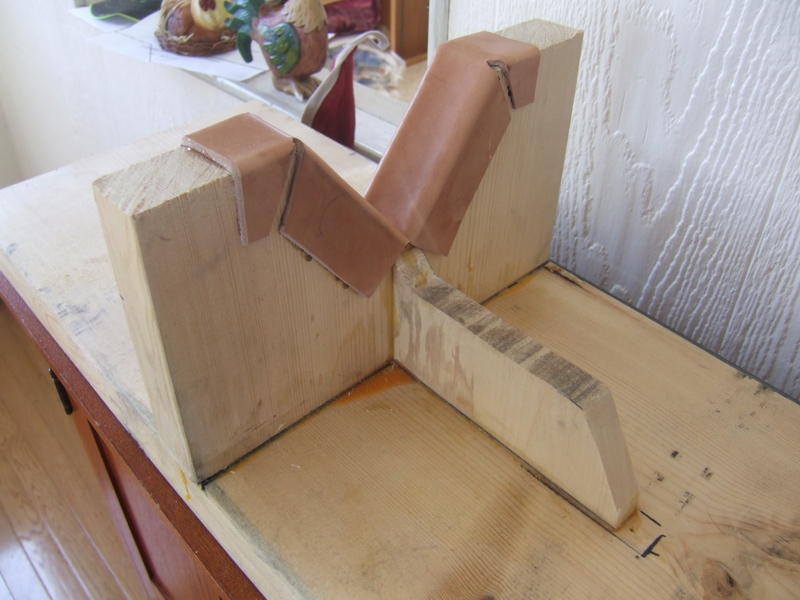
It might have been smarter to put the support on the opposite side of the forend to give the gun more clearance. For the purposes of cleaning, I haven’t found this to be a problem.
Here is a close-up of the padding on the wood worker’s clamp.

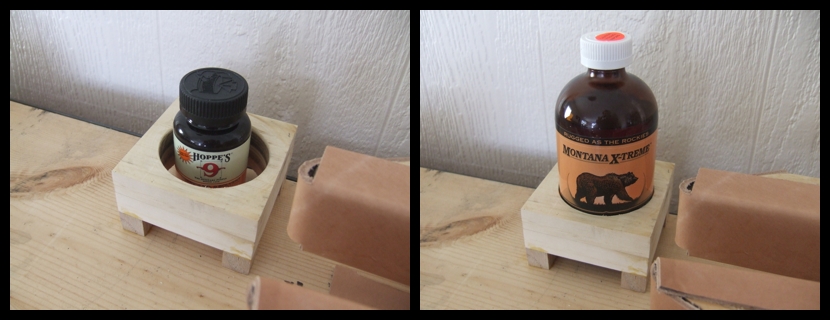
This is a feature I didn’t draw on the schematic: a 3″ well for holding solvent bottles. While it’s a little large for the small 8 oz bottles (though it will still prevent spills), it fits the 16 oz bottles perfectly as you can see on the picture below.
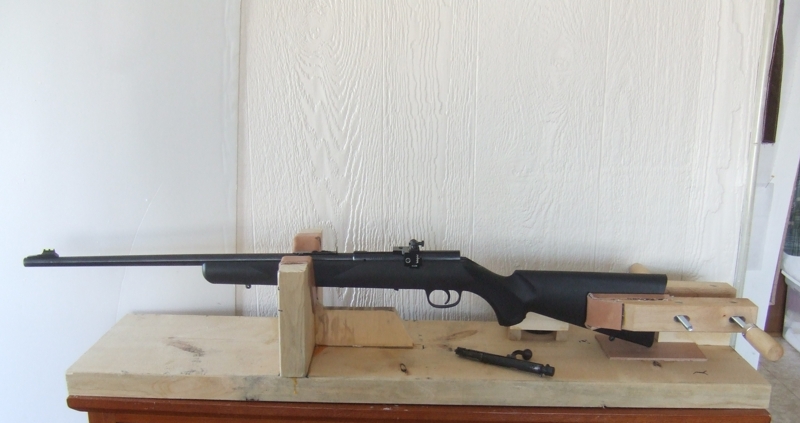
Here’s another view of the Marlin, securely clamped in place and ready for cleaning:
Posted in DIY, Guns, How To | 7 Comments »